How to Save Fuel with an OBD II Scanner
Summary
Product Name : ScanGauge II

Function : ECU Data Reader and Vehicle Computer Diagnostics, Performance Monitoring, Error Code Resetter
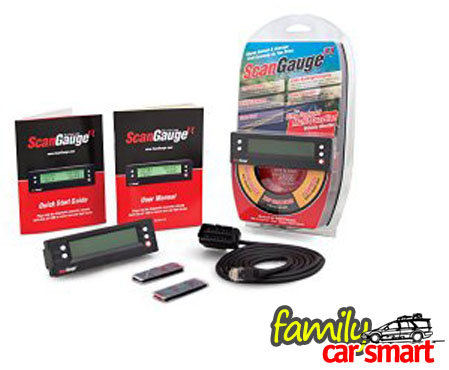
Packaging : see picture (may vary by country)
Price : GBP 113 (UK), USD 159 (US)
Where to get it : Amazon.com (US), Amazon.co.uk (where I got it)
Ease of use : *** (needs to bend your back for cable routing)
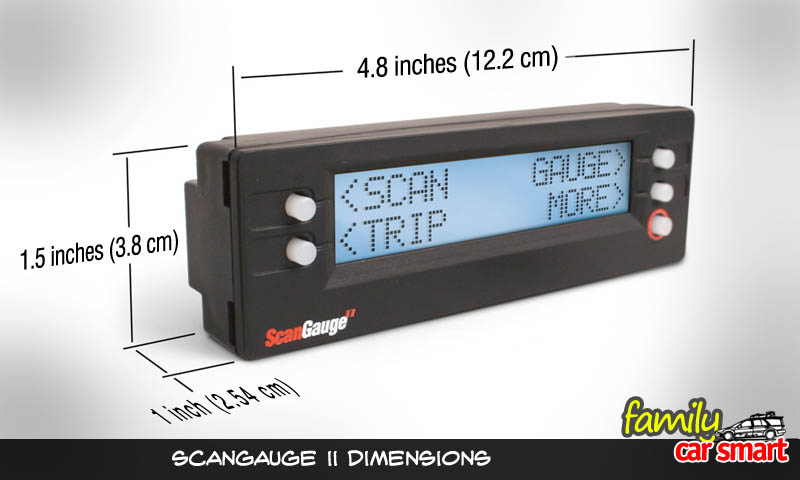
Dimension : 4,8 inches (12.2 cm) x 1 inch (2.54 cm) x 1.5 inches (3.8 cm)
Display : dot matrix 2 lines, 4 data, customizable background color
Warranty : 3 years (must send it back to Linear Logic, the manufacturer)
What’s in the package : ScanGauge II, Quick Start Guide, User Manual, two Velcro strips, one connection wire
Quick recommendation : Recommended, helps monitoring fuel usage and changing driving habit.
Downside : Outdated design, doesn’t have real date calendar.
Introduction
How do we save fuel? By monitoring its use. Doing this, in real time or not, is the easiest and definite way to save fuel. There are devices that are available which can display vehicle fuel , one of them is the ScanGauge II. It works as an OBD II scanner, plugs to the OBD II connector, reads the data streams, and presents it on its display. The display can show 4 data at once.
Changing driving habits can change fuel-economy by up to 33%. ScanGaugeII provides real-time data about your vehicle’s instant and average fuel economy, fuel used, cost of fuel used for each trip, cost per mile, gallons per hour and more! With this gauge on-board, we would want to keep the fuel consumption to the best possible while driving.
Available functions
Main function: Showing fuel consumption (instant /realtime /average for trip, daily, tank). It can show 4 data items simultaneously. Other data that can be displayed are voltage, engine speed, distance, trip meter.
Other function: Scan Tool to Display and Clear DTC Codes.
The ScanGauge II can display the DTC (Diagnostic Trouble Codes. It can also clear the codes (turning off the Check Engine light).
X- Gauges (customized gauges): for displaying data that would not normally show on gauge 4 data displays. In factory default condition, there are data stored in Scangauge II which are not displayed without going through the menu. To display the data in the display (say the average speed for one tankful), the data average speed must be allocated to a gauge memory slot. The manual shows how to do this. It takes some tweaking though, but it gives useful result.
Performance monitoring function: The device can record a performance run, such as ¼ mile time, 0-60 mph time, and braking performance. Quite fun for those who intend to check vehicle performance. Data recording interval is 0.2 second with monitor turned off, 0.4 second with monitor turned on (may vary by data parameter too).
What’s in the box
Package includes the ScanGauge device, two Velcro strips, a quick start guide, a 6 ft cable, and a user manual.
Dimensions: As in the following picture
Installation instruction
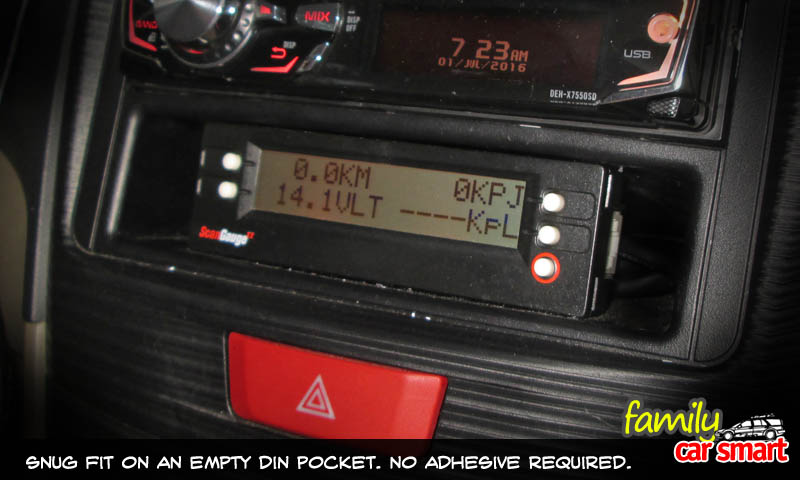
Installation is fairly easy. Uses the available Velcro strips. Basically what is required is determining where the gauge will be located, attaching the wire to OBD port, routing and securing the cable, and plugging the cable small end on the gauge. Then the vehicle is turned on, and after a few seconds the OBD II scanner will show that it is connected (see video). Location of the gauge should be determined first. Tips: An empty DIN pocket might fit perfectly (see picture).
The Scangauge II can also be mounted on car inside mirror or window using optional accessories, such as the BlendMount BSG-1000 Designed for ScanGauge II or the Linear Logic SGMOUNT Scan gauge Window Mount
.
ScanGauge II requires basic parameters to be input, such as engine size, fuel type, fuel tank size, and unit of measure, currency type.
Display:
– Display for 4 data at one time
– Customized scree background color
– Can be daisy chained to another Scangauge using Ethernet cable.
Actual setup:
Installation: We had it installed on an empty DIN pocket, drilled a hole at the back of the pocket to pass the wire, and plugged the wire to the back port of the gauge instead of the side port. From the car occupant’s seat, it gives a quite OEM look, no wire dangling around the dash.
Connecting: After putting the gauge at the DIN pocket, the OBD plug is inserted into the car’s OBD connector. The gauge showed “Connecting … ” and ignition turned on. A successful connection was indicated with the gauge displaying several basic gauge information (see video).
Setting up parameters:
Next was setting up the parameters. The required parameters to setup were: units, engine size, tank size, fuel type, currency. We used metrics for dimensions.
Reliability
Is it reliable? It’s been installed in my car for more about 4 years, and has never failed to do its duties. It seems quite reliable.
Downside: The most annoying is that it does not have a real calendar. A 8 hour engine off is conceived as change of date. If the vehicle is driven late at night and starts early in the morning, the device does not recognize that it is already the next day. Thus the daily trip functions goes awry.
Another flaw is that there is no feature for long trip (multiple tank fill-ups) data recording. To overcome this, a workaround is made by not resetting tank fill-up sequence during fill-ups.
And after that, there is a limit on the distance where fuel consumption can be calculated correctly. After a specific distance (quite far, more than 700 or so kilometers), fuel consumption calculation displays wrong data.
Not all vehicles allow reading of OBD data from the vehicle port. Please check for compatibility first before buying. Best yet, borrow a friend’s Scangauge to test if your car will give the data. And every car may be specific on which data are available or can be read by Scangauge II.
Conclusion
Despite its downsides, I would still recommend Scangauge II for car owners. It has lots of useful functions not available from a vehicle built-in multiple information display. It helps me building the habits to save fuel, such as (a) trying to keep the engine at most economical speed, (b) preferring trip times at low traffic conditions, (c) being easy on acceleration.
Tips:
Separate wire ties are recommended for routing the cable. Remember though that using wire ties will make it harder to change Scangauge II placement later.
Safety precaution: With the gauge displaying trip /tankful average and instant fuel consumption while driving, we might have the tendency to make the instant fuel consumption beat the average, to lower the average consumption. This should be done with caution to traffic condition. Also quite important is the location of the gauge, since we might want to look at the display often and look away from the road.
Other choices
There are other OBD readers on the market today. And they are getting cheaper. Many now can be wirelessly connected to cell phones. The Scangauge II may look outdated compared to these.
For those who like a classic design and look and easy to monitor fuel consumption gauge, I’d consider the Scangauge II is a viable option. You can get ScanGauge II here (US) or here (UK).